Shoulders And Chest
Back to the Table of Contents
The following exercises increase the mobility of your shoulder joints and strengthen the chest muscles. Begin by taking ten deep breaths. Remember, do not hold your breath while you do any exercise. Breathe rhythmically in and out.
-
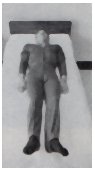
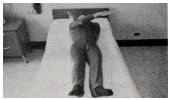
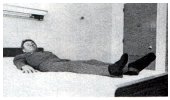
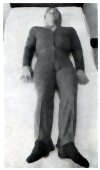
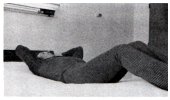
Straight Arm Lifts
-
1. Lying on your back, place your arms down by your sides.
2. Keeping your elbows straight, lift your arms up and as far back over your head as you can.
3. Keeping your elbows straight, lower your arms to your sides.
|
|
| |
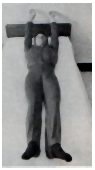
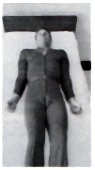
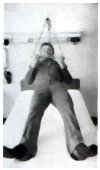
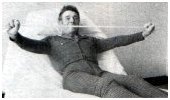
- Side Arm Lifts
-
1. Lying on your back, place your arms down by your sides.
2. Keeping your elbows straight, bring your arms out to the sides and on up over your head until your hands touch.
3. Keeping your elbows straight, lower your arms back to your sides again.
|
|
| |
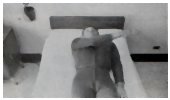
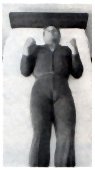
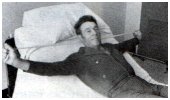
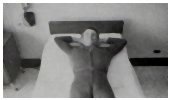
- Elbow Touches
-
1. Lying on your back, place your hands behind your head, elbows flat on the bed.
2. Bring your elbows together in front of your body.
3. Lower your elbows back down to the bed.
|
 |
| |
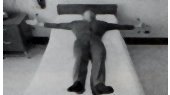
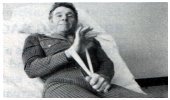
- Straight Arm Crosses
-
1. Lying on your back, put your right arm out straight to the side at a right angle to your body.
2. Keeping your elbow straight, bring your arm across your chest to your left side.
3. Keeping your elbow straight, return your arm to its original position.
4. Repeat with your left arm
5. Try to use both arms at once, crisscrossing them in front of you.
|
|
Elbows And Wrists
Back to the Table of Contents
The following exercises help preserve the mobility of your elbow and wrist.
|
|
- Elbow Bends
-
1. Lying on your back, place your arms down by your sides and make a fist with each hand.
2. Bring your fists up to your shoulders, bending your elbows.
3. Lower your fists to their original position.
|
|
| |
- Wrist Rotation
-
1. Lying on your back, make a fist with each hand.
2. Make small inward circles with your fists.
3. Reverse directions and make small outward circles.
|
 |
Now is a good time to stop and rest. If you are tired, pause and take ten to twenty deep, relaxing breaths!
Try to relax your neck and shoulders. Don't let tension build up, and you won't tire so easily. Place your hand on your stomach and try to make it rise when you inhale. Blow out as long as you can.
Hips, Knees And Ankles
Back to the Table of Contents
The following exercises mobilize and strengthen your walking mechanisms.
| |
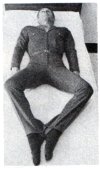
- Knee To Chest Lifts
-
1. Lying on your back, place your legs together flat on the bed.
2. Bend your left leg and bring your knee up toward your chest.
3. Straighten your knee while lowering your leg slowly to the bed.
4. Repeat with your right leg.
|
|
| |
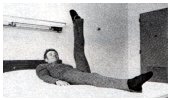
- Straight Leg Lifts
-
1. Lying on your back, place your legs together flat on the bed.
2. Keeping your knee straight, lift your left leg as high as you can.
3. Keeping your knee straight, lower your leg slowly in the bed.
4. Repeat with your right leg.
|
|
| |
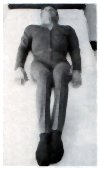
- Knee Touches
-
1. Lying on your back, bend both knees, keeping your feet flat on the bed.
2. Relax and let your knees fall slowly outward as far as they will comfortably go.
3. Bring your knees back up together.
|
|
| |
- Ankle Rotation
-
1. Lying on your back, lift your right heel a little off the bed and make small inward circles with your foot.
2. Reverse direction and make small outward circles.
3. Repeat with left foot.
|
|
Trunk
Back to the Table of Contents
The following exercises strengthen your trunk.
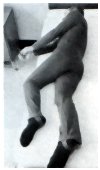
- Side-to-Side Rolls
This exercise helps prevent bedsores.
Caution: If you are in a hospital bed, do this exercise with the bedrails raised.
If there are no bedrails, have someone stand beside the bed, to make sure you do not roll out of bed.
- 1. Lying on your back, slightly bend your knees and elbows.
2. Lift your left shoulder and roll to the right reaching with your left arm for the bedrail or the side of the mattress.
3. Roll back and repeat the exercise on your other side.
|
|
| |
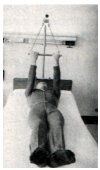
- Trapeze Bar Pull-Ups
-
1. Lying on your back, put both hands up on the trapeze.
2. Lift your buttocks up off the bed.
3. Try to get your nose or chin up to the bar.
|
|
| |
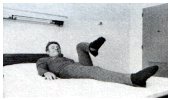
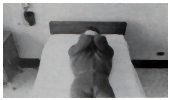
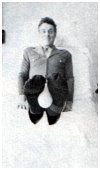
- Partial Sit-Ups
-
1. Lying on your back, clasp your hands behind your head.
2. First, try to lift your head off the pillow.
3. Next, try to lift your head and shoulders up.
|
|
Stage I Medi-Gym® Exercises
The next set of exercises uses the Medi-Gym® equipment for added resistance in your exercise routine.
If you are tired, take a rest before proceeding. Breathe deeply ten to twenty times.
In the following exercises you will use the clothespin, rubber band, exercise putty, sponge ball, elastic sheet and breathing bag from your Medi-Gym®
Clothespin and Rubber Band
Back to the Table of Contents
The following exercises use a clothespin and rubber band to strengthen your hands and fingers. These exercises can be done even if you have an intravenous feeding tube in your arm.
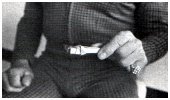
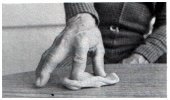
- Finger Squeeze
-
1. Squeeze the clothespin between your thumbs and first two fingers. If this is too difficult, squeeze the clothespin between your thumb and four fingers.
2. For added resistance, wrap a rubber band around the tip of the clothespin and repeat the exercise.
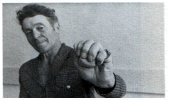
- Advanced Finger Squeeze
-
1. Hold the clothespin between your thumb and first finger, trying to keep your thumb and finger in a circle.
2. Open the clothespin to its fullest and hold it open for a few seconds.
3. Repeat with your thumb and each of your other fingers.
4. For added resistance, wrap a rubber band around the tip of the clothespin and repeat the exercise.
|
|
| |
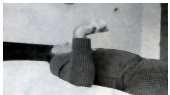
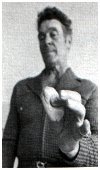
- Finger Spread
-
1. Place a rubber band over the fingers of one hand, stretching the rubber band.
2. Spread your fingers apart.
3. Repeat with your other hand.
|

|
Exercise Putty
Back to the Table of Contents
The following exercises use exercise putty to give coordination control and to strengthen your hands. The putty can be pulled, worked in a ball, or bounced.
Use your imagination to devise your own exercises in addition to the ones below.
- First and Second Finger Pinch
-
1. Place a ball of putty between your thumb and first finger.
2. Squeeze through the ball until your thumb and finger meet.
3. Repeat with your thumb and each of your fingers.
|
|
| |
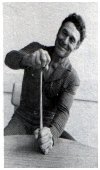
- Wrist Pull-Ups
-
1. Place your left forearm on a table and hold a piece of putty in your left hand.
2. Hold the other end of the putty in your right hand.
3. Pull the putty up with your right hand, bending your right wrist back.
Repeat with your other hand.
|
|
| |
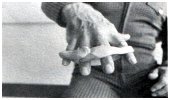
- Finger Spread
-
1. Make a loop out of the putty.
2. Place the loop around the fingers of one hand between the two top joints.
3. Spread your fingers apart against the loop.
4. Repeat with your other hand.
|
|
| |
- Finger Opening
-
1. Smash the putty flat with the palm of your hand.
2. Stick your thumb and first finger into the putty close together.
3. Push your thumb and first finger apart.
4. Repeat with your thumb and each of your other fingers.
|
|
| |
- Hand Squeeze
-
Squeeze the putty in your hand like a ball, moving it about at the same time.
|
|
Sponge Ball
Back to the Table of Contents
The sponge ball is lightweight, easy to handle and safe -- it won't bruise your skin if hits you. Some of the following exercises are done lying down others sitting up.
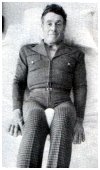
- Knee Squeeze
- Lying down or sitting up, put the ball between your knees and try to hold it there.
|
|
| |
- Leg Lift
-
Lying down, put the ball between your feet and try to lift it off the bed. (Blow out as you lower the ball back to the bed).
|
|
| |
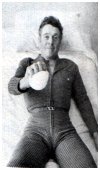
- Hand Squeeze
- Squeeze the ball in your hand, moving it around at the same time.
|
|
| |
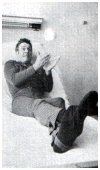
- Up and Down Toss
- Sit up (make sure your bed rails are up), throw ball up and catch it.
|
|
| |
- Side-to-Side Toss
- Toss the ball from one hand to another, leaning from side to side to catch it.
|
|
| |
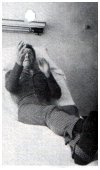
- Clap and Catch
- Toss the ball back and forth with a friend. For more coordination, try clapping your hands just before catching the ball.
|

|
Elastic Sheet
Back to the Table of Contents
The following exercises use an elastic sheet for resistance. The sheet is very thin and easy to stretch. All exercises may be done lying in bed or sitting up.
Caution Never use the elastic sheet close to your face. If you lose your grip on it, it could injure your face or eyes.
Do not do these exercises if you have any weakness or tremor or if your grip has been injured.
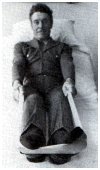
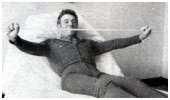
- Arm and Chest Stretch
- Grab hold of both ends of the elastic sheet and stretch it sideways.
|
|
| |
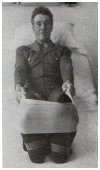
- Chest and Shoulder Stretch
-
Stretch the elastic sheet apart behind your head or back.
|
|
| |
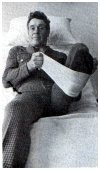
- Wrist Stretch
-
1. Hold both ends of the elastic sheet in your left hand.
2. Loop the sheet around your right wrist.
3. Try to push your right wrist up against the elastic sheet.
4. Repeat with your left wrist.
|
|
| |
- Calf Stretch
-
1. Hold one end of the elastic sheet in each hand.
2. Bend your knees and loop the sheet over the bottom of your feet.
3. Push down on the sheet with your feet while pulling the sheet up with your hands.
|
|
| |
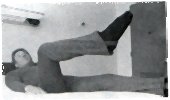
- Leg and Thigh Stretch
-
1. Hold one end of the elastic sheet in each hand.
2. Loop the sheet over the bottom of your left foot.
3. Bend your left knee toward your chest.
4. Push your left leg straight out against the elastic sheet while pulling the sheet up with your hands.
5. Repeat with your right foot.
|
|
| |
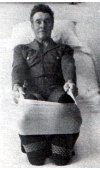
- Thigh Stretch
-
1. Hold one end of the elastic sheet in each hand.
2. Loop the sheet over the bottom of your feet.
3. Try to spread your legs apart against it.
|
|
|
|